sailing homepage :
trip reports :
summer refit :
brightwork prep
Previous: boatyard hell
Next: painting & wiring
June 24-25: Brightwork Prep
It seems like a long time since the last update, but our hellish trip to Nelson's Marine boatyard took from May 16th until the 31st, and another two weeks for the sensor installation to be corrected. Bastards.
The weekend of the 17th Sara and I were in New Hampshire for our friend Amy's wedding. It was beautiful, right on the water, and it was a well-deserved break from all the craziness going on in California.
So it wasn't until June 24th, five and a half weeks after we bought the boat, that we could actually start to work on her. We had been brainstorming, making list after list, buying materials, and planning everything, of course, but this weekend was the start.
When my parents were in town for our engagement party in the last week of May, they volunteered to spend almost a week working on the boat: scraping away the varnish on the cockpit. It's too bad I don't have any pictures in-progress, because you can see from the before and after shots it was a lot of work!
|
|
Bekks and John had inspired us, and we decided that our first job was going to be the brightwork. We bought a bunch of materials before getting started, and invited our good friends Kara, Beth, and Mike down to help us. We thought we might be able to get everything done in two days; it turns out we barely had enough time to put on a single coat.
On Saturday we got an early start. The first task was to clean the teak, which meant we needed to sand everything flat. No problem, right? Wrongo! You can't sand varnish.
My parents had scraped most of the varnish off the cockpit trim, but they hadn't gotten around to the companionway hatch and trim. Maybe they stopped because it was so daunting. It needed a lot of work.
Mike stepped up and tackled the companionway hatch and door. Kara and I worked on the toe-rail and the wood trim on the cabintop. Beth and Sara polished all the metal on the boat. Everyone except Mike swapped jobs and rotated around. Mike worked on the hatch.
|
|
We had some tools, but it turned out the best method was with sanding blocks and fresh sandpaper. We sanded all day. The teak slowly became less and less gray, and started to look beautiful. We sanded, and sanded some more. We sanded everything two or three times. Then we sanded it again.
|
|
Saturday ended late. We worked hard.
Sara and I woke up on Sunday feeling like a truck had run us over. We were sooo sore. The repetative back-and-forth sanding motion isn't muscle-friendly, it's a friggen workout!
We started with the final sanding jobs, and were quickly joined by Mike. He went straight back to work on the hatch. The varnish was turning out to be impossible to remove: lots of scraping, sanding, cleaning, and repeating.
Sara started applying the teak cleaner while I sanded just one more section. It's hard to know when to say "enough!" - the wood was in such bad shape and it was looking completely different.
|
|
We sanded and hit the bowsprit with the teak cleaner, then followed it up with some teak oil. Mike finally finished the hatch. We cleaned every last strip of wood: the full-length toe rails, the cockpit sides, the companionway entrance and hatch, the handrails, and the decorative wood trim. It was soo much work.
Mike left after dinner in San Rafael, and Sara and I head back to the boat to mask off the wood and slap on the first coat of West Marine Wood Pro Plus - the Cetol alternative we were using.
We ended up finishing about 10:30PM; I was holding the light while Sara finished painting the first coat on the last section.
Monday morning we woke up feeling like the truck had backed up to finish us off. It was a long and exhausting weekend, but the boat looks immeasurably better.

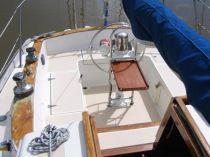 Old ugly wood varnish
 Scraped and sanded clean
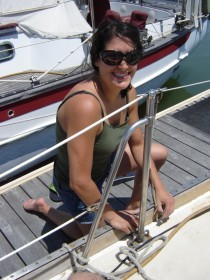 Kara sanding the toerails
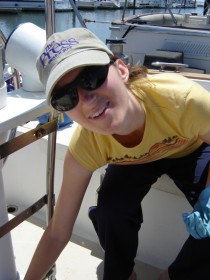 Beth polishing the metal
 Will and Mike, sanding demons
 Mike, sanding some more
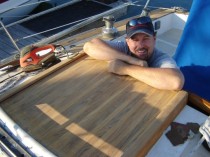 Mike finished with the hatch
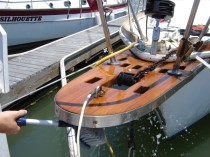 Sanded, cleaned, oiled bowsprit